So, you want to start a blog. huh?
Well, Congratulations! 🎉
You are going to make one of the best decisions of your life.
Why?
Because Blogging is a powerful way to share your knowledge with the world and make money doing what you love.
Whether you want to start a blog as a hobby or you are planning to quit your job with blogging income, trust me this is going to be a fun ride.
Best part:
Starting a blog in 2024 is easier than ever. In fact, your blog will be up & running in under 20 minutes or so.
And, I am going to show you how to start a blog step-by-step.
So, without further ado, let’s dive right in.
In This Post
1. Choose a Profitable Niche

The first thing you need to do is to decide what niche are you going to write about.
Niches are like topics around which you will be writing content.
So choosing a niche that you are passionate and knowledgeable about is important.
If you choose a niche everyone is blogging about but you are not interested in the niche at all.
Two things will happen:
First, you will get tired of writing on the blog. Second, your blog will become a sure shot failure.
So, choose a niche around which you can write tons of content with joy.
That will make blogging a piece of cake.
How do I choose my blog niche?
To make things easier, grab a pen and paper. Then start writing down a few topics you have solid knowledge about.
For example Soccer, fashion, beauty, and so on.
Now choose one of the niches from the list in which you can write plenty of content.
Suppose you choose Soccer, the niche is popular and there are millions of soccer fans out there who love to read interesting articles about soccer.
And you can write plenty of content around it like ” Soccer News”, “Top 10 best Soccer players in the world” and so on.
So, Soccer is going to be your perfect niche. Cheers!
Now that you found your niche, it’s time to move on to the next step:
There are tons of hosting providers out there. Some are cheap and some are expensive.
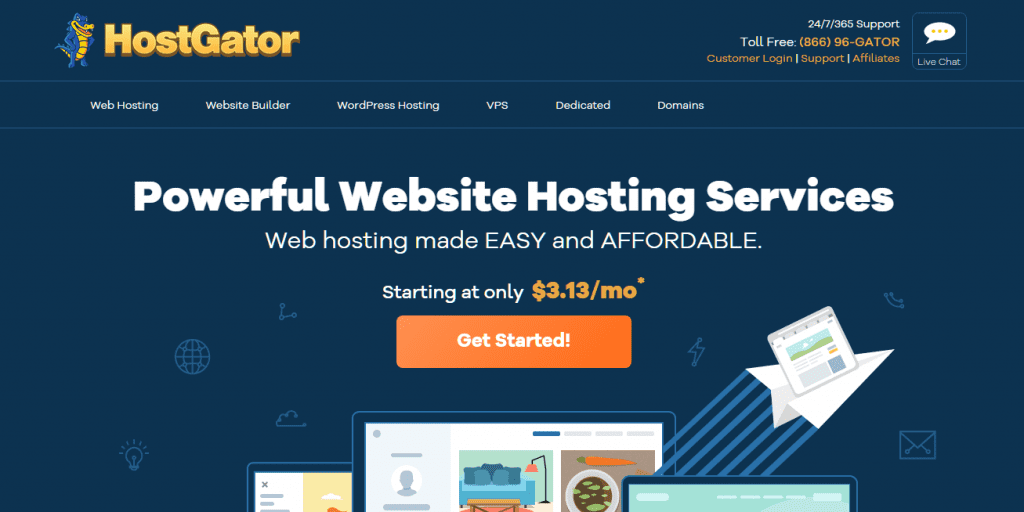
Instead of going through all of them, I recommend you to go with Hostgator.
They are affordable, provide quality service, and great customer support.
2. Select a Hosting Plan
Visit HostGator and click on ‘Get Started’.
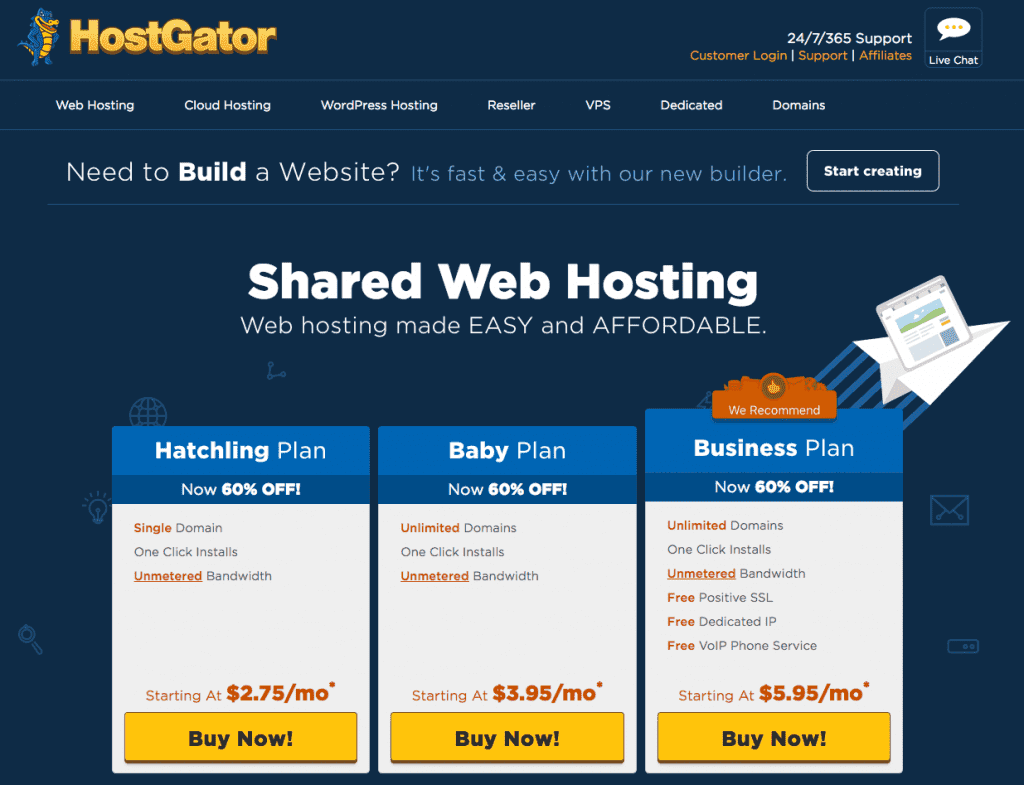
On the next page, you have to select a hosting plan that best fits your needs.
If you just want to work on a single website, then you can select the Hatchling Plan.
If you want to host more websites, then you can select other plans with more features.
Don’t worry, you can always upgrade later if you need more features.
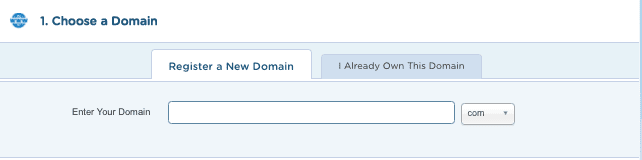
3. Choose a Domain name.
A domain name is your online address. For example Pixeldimes.com.
A domain name doesn’t really affect how successful your blog will be but choosing a niche related and short domain will make it easy to remember.
Example: MySoccerClub.com.
That’s a short and sweet domain name that defines the niche ‘Soccer’.
Type in your desired domain name and if it’s available to register you are ready to go.
If not, try another domain name.
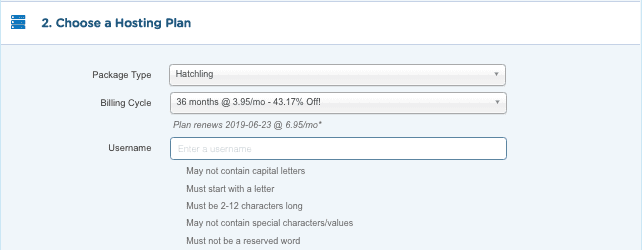
4. Confirm Hosting Plan
In this step, you need to confirm the hosting plan you selected. You can also adjust the billing cycle to get more discount.
If you buy the hosting service for a more time period, you will receive more discounts.
But do this only, if you want to commit yourself to blog for a long time.
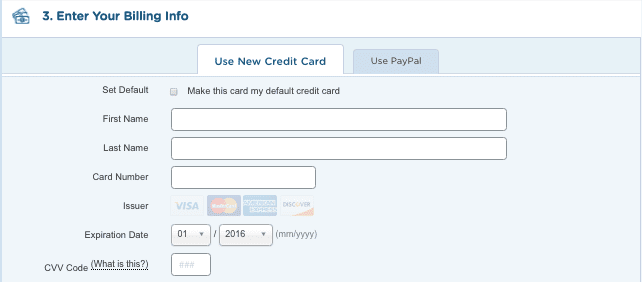
5. Enter Billing Info
Enter your basic details and then you can pay using your Credit card or PayPal account.
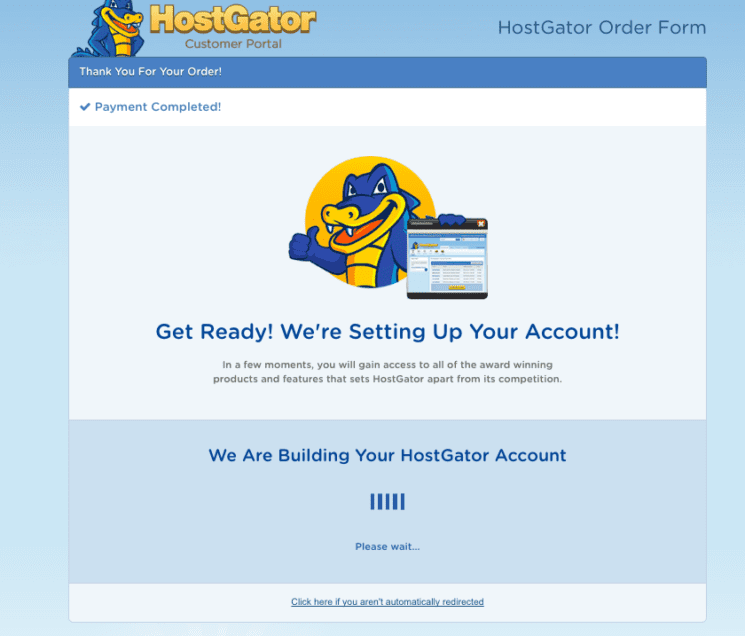
Then you will see this page where HostGator will confirm the payment and start setting up your brand new HostGator account.
6. Install WordPress
Hostgator provides a one-click WordPress install feature that allows you to set up the world’s popular Content Management System (CMS) WordPress with few button clicks.
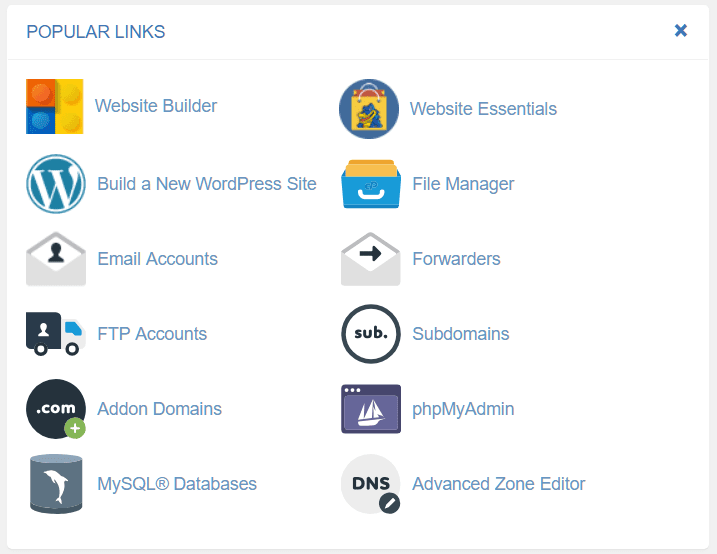
To install WordPress, Login to your control panel using the details provided by Hostgator. ( Check your emails for the information.)
After you have successfully logged into your control panel, click on ‘Build a New WordPress Site‘.
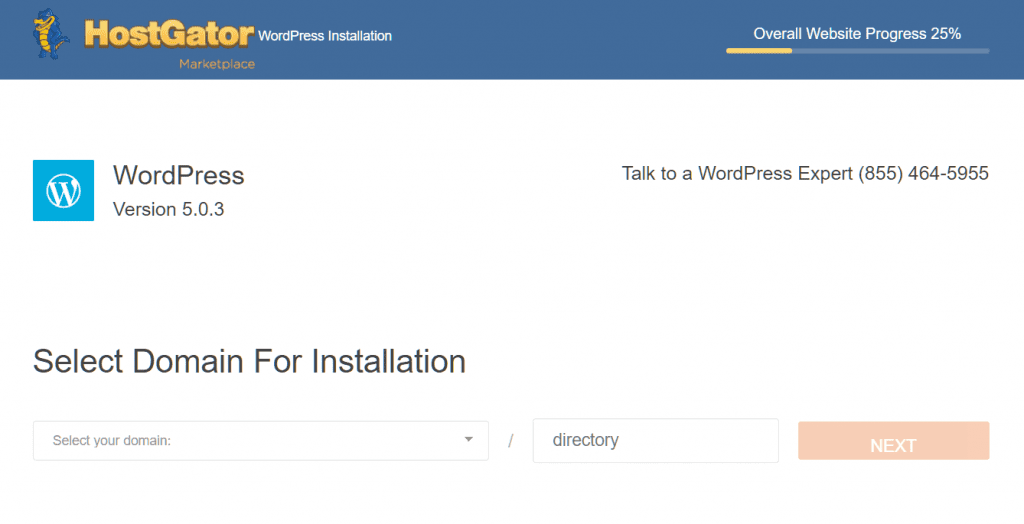
Then you will see this page. In this step, you have to select your domain name and click on ‘Next’.
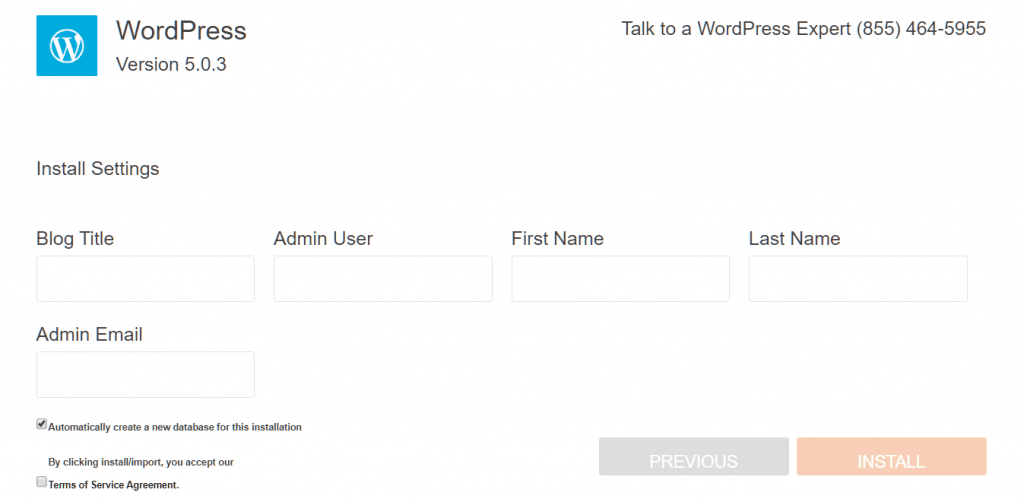
Then you will see this page, where you have to enter your Blog Title, Admin username, First Name, Last Name & Admin email.
Then, Accept Terms of Service Agreement and click on ‘Install’.
It will take a minute or so. Then you will get notified about the successful installation of WordPress on your site.
You will also receive details of the installation like Admin, username, Password, and WordPress Admin link.
Note them down, they might come in handy if you forget the password.
Visit- YourBlogurl.com/wp-admin and log in using the details provided after the installation.
You are ready to customize the blog using hundreds of free themes or use a paid one.
Note: If you need any help during the installation or if you want me to customize your blog from start to finish then contact me using the form below.